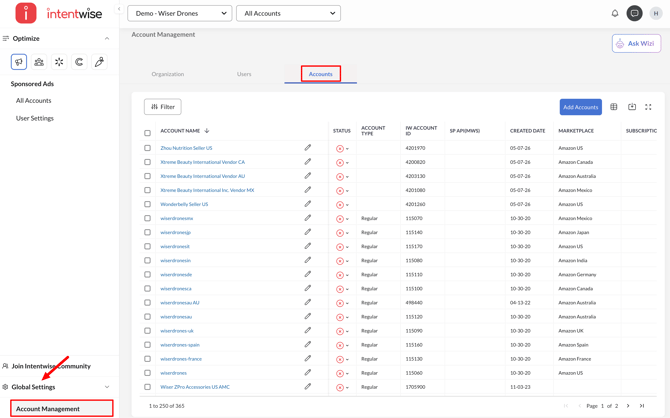
Only Admins can access the Accounts section under Global Settings > Account Management > Accounts.
Table Columns Overview
Below is a breakdown of each column in the Account Management Table:
-
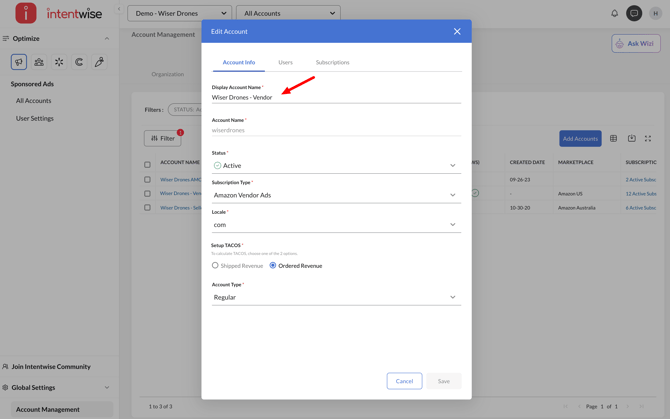
Account Name: Editable name of the account. This column is pinned by default. You can click on the pencil icon to view/edit settings like name and users.

-
Status: Toggle the account on or off to enable or disable the account on Intentwise.

- IW Account ID: The unique account ID used within Intentwise (formerly displayed as "Account ID"). This ID is useful to identify accounts for Intentwise Analytics Cloud or Walmart onboarding.

- SP API (MWS): This access is necessary to see the account sales data on the Intentwise Ads platform or Intentwise Analytics Cloud data destinations. SP API is required to access Amazon Seller Central or Vendor Central data.

Here are the steps to provide SP API access for Seller accounts and Vendor accounts. - Creation Date: When the account was added to Intentwise.
- Marketplace: The marketplace tied to the account (e.g., Amazon.com, Amazon.in).

-
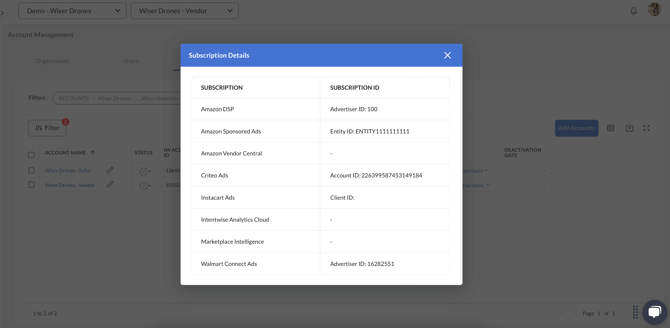
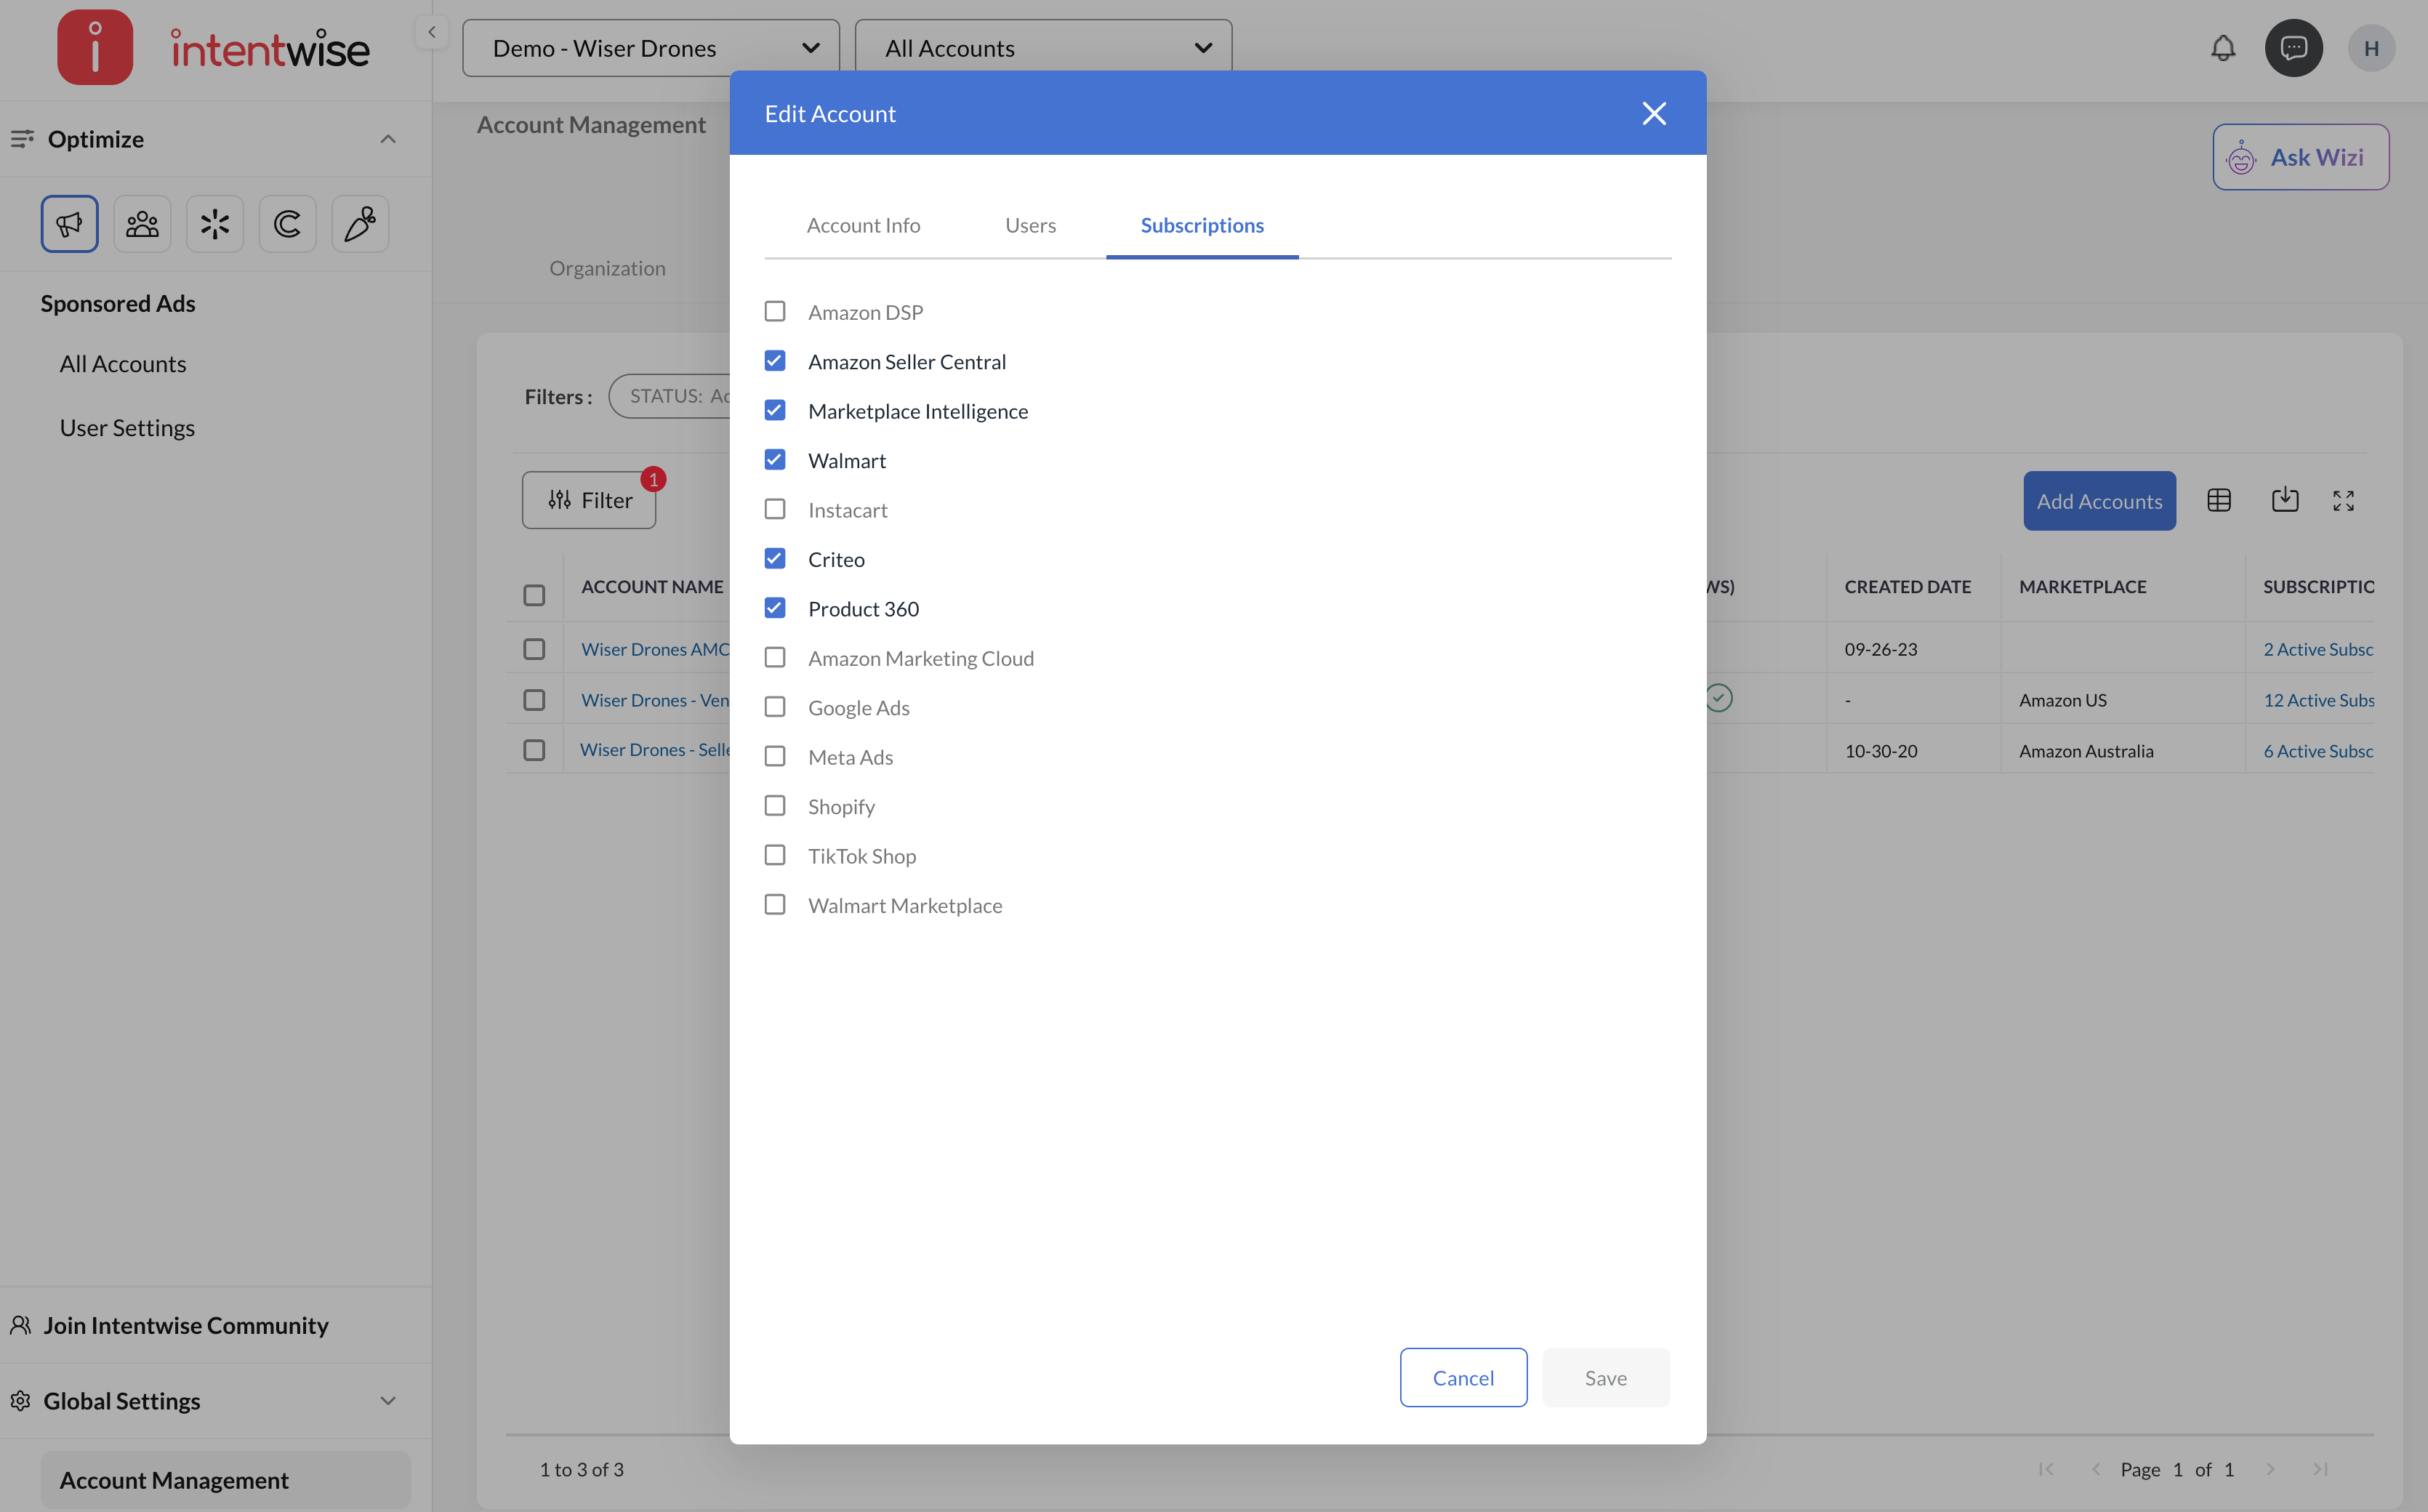
Subscriptions: Displays all active subscriptions for the account. Click to expand and view the subscription name and associated IDs (such as Advertiser ID, Merchant ID, or Instance ID).
-
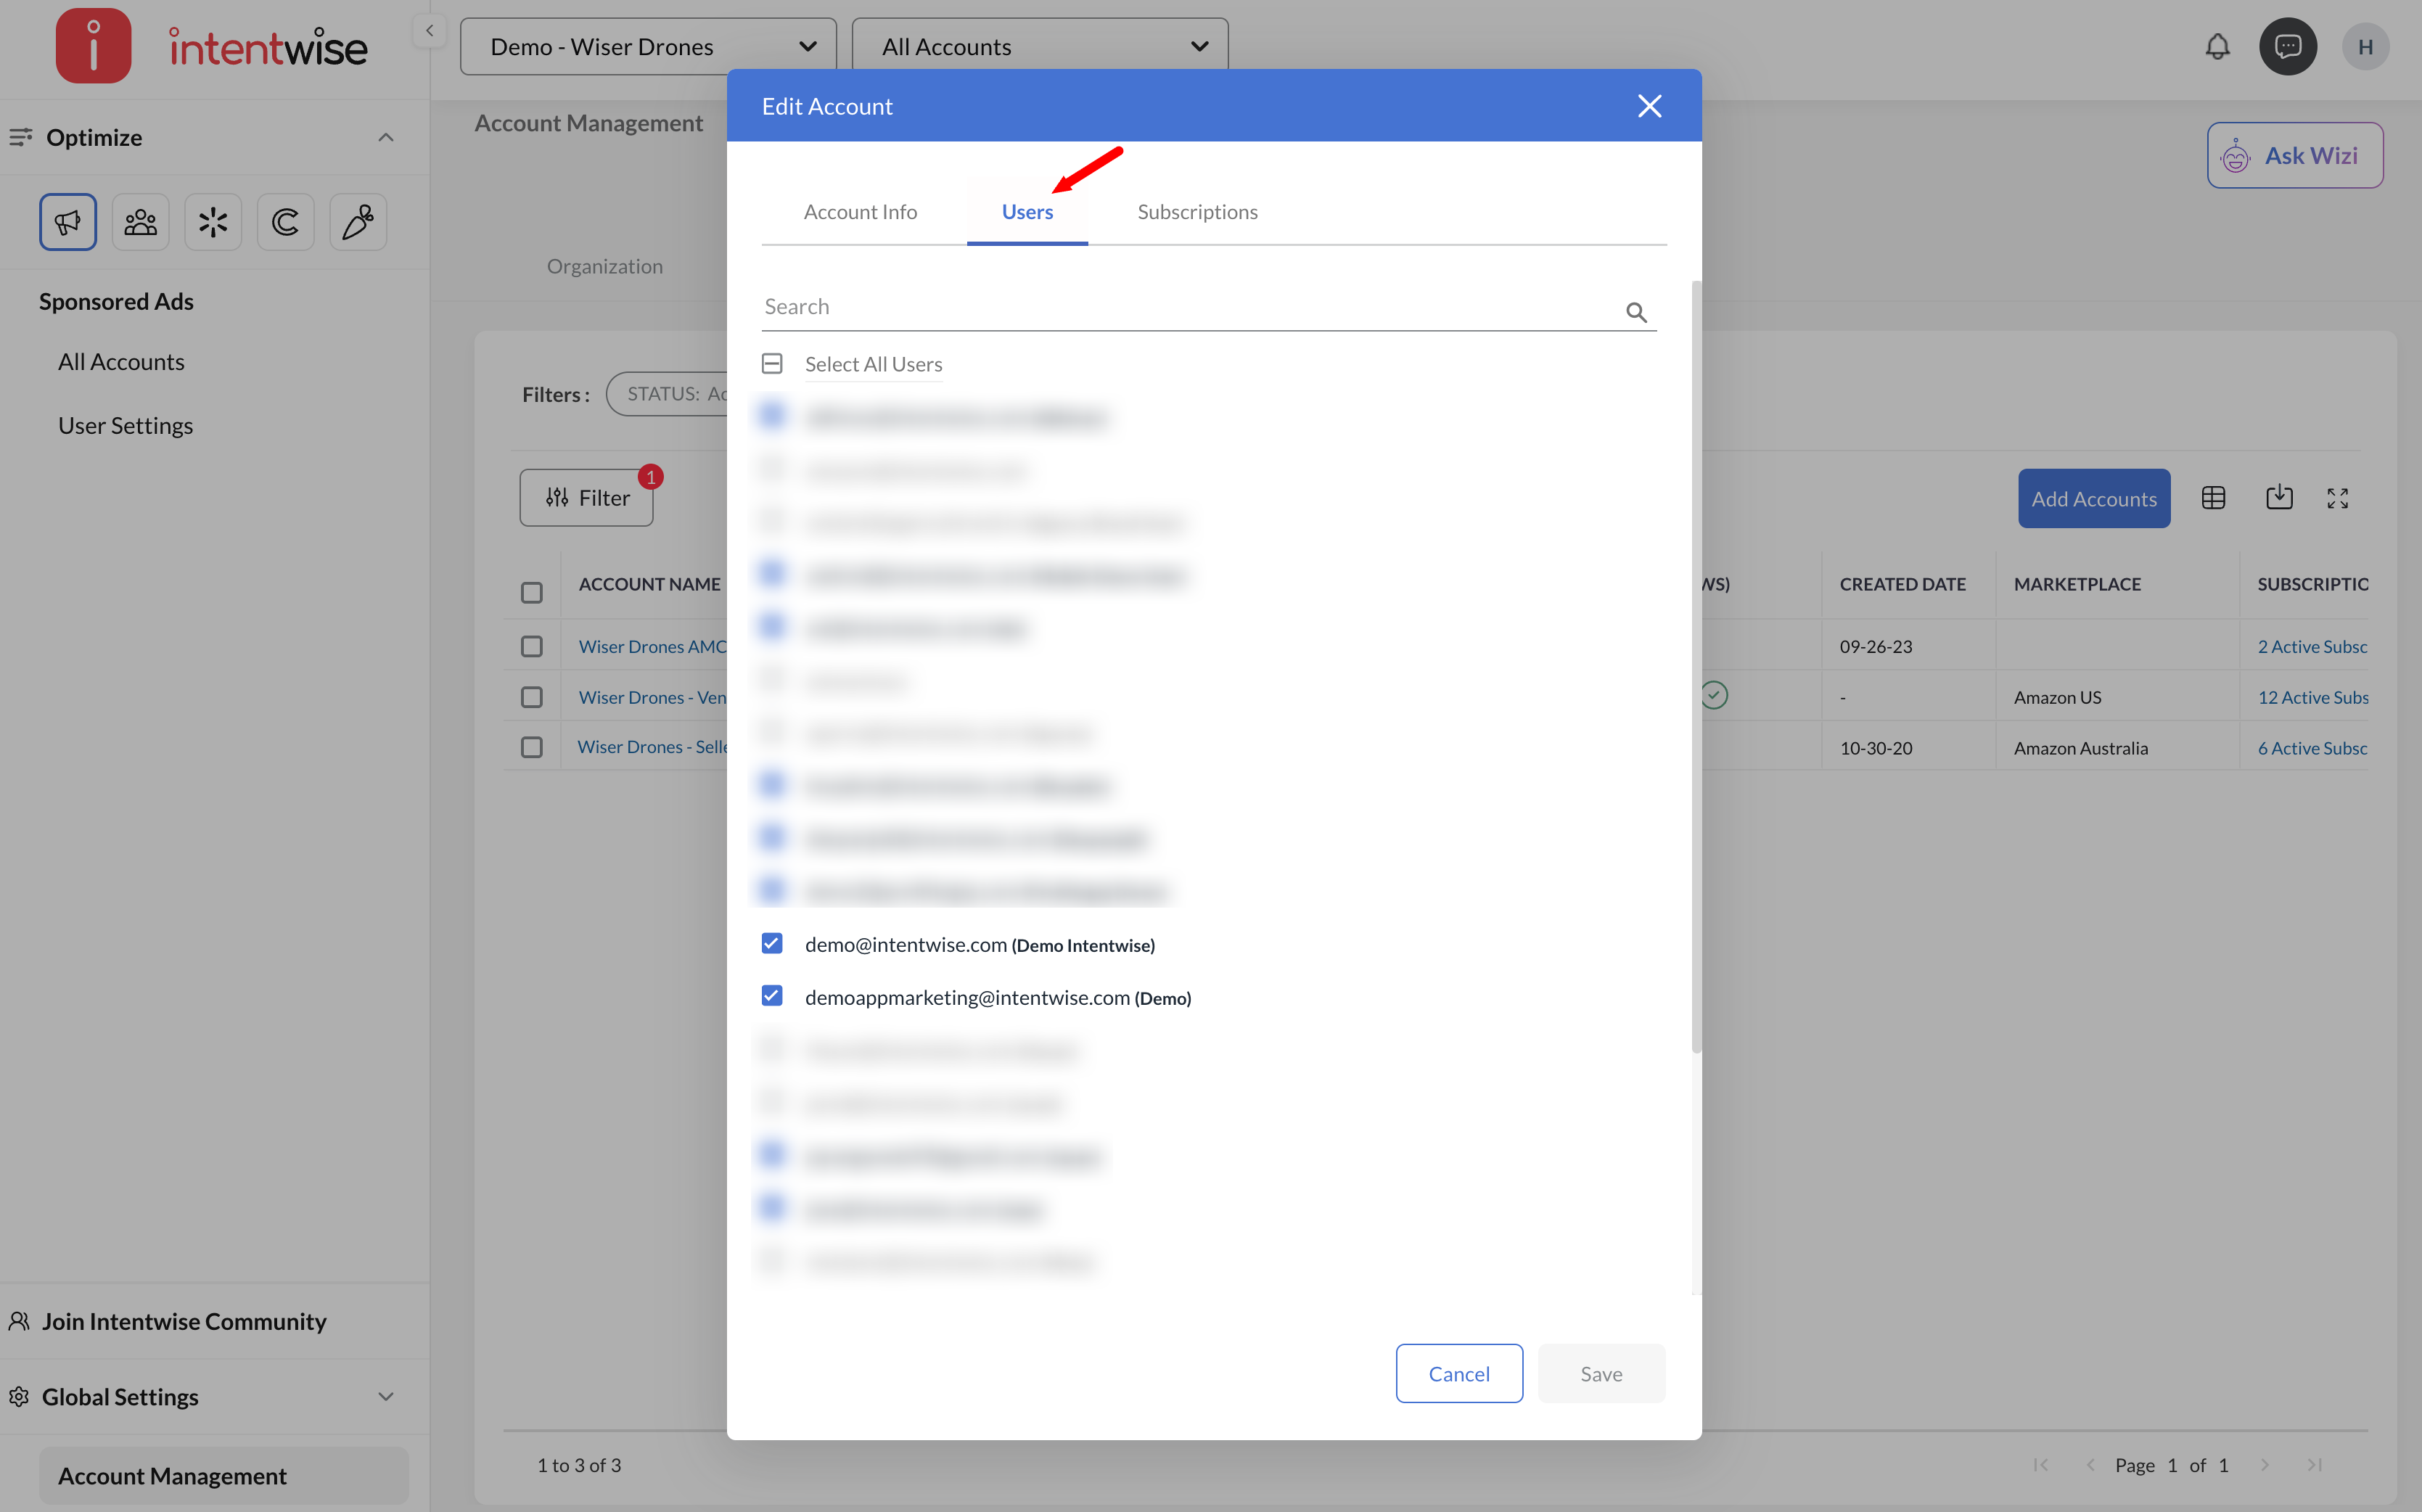
Users: Shows a dropdown with a count of active users linked to the account.

-
Locale: The account’s locale. Hidden by default.
-
Deactivation Date: Shown only for deactivated accounts. Hidden by default.
Subscription Details:

- Amazon Sponsored Ads: Includes Amazon advertising data for Seller or Vendor accounts. Metrics include Impressions, Clicks, Spend, Sales, ROAS, and ACOS. Associated IDs include Merchant ID (Seller) and Entity ID (Vendor).
- Amazon Seller Central: Surfaces Amazon's organic sales data, such as Ordered Revenue, Ordered Units, and Organic vs. Ad Sales breakdowns for Seller accounts.
-
Amazon Vendor Central: Provides organic sales data such as Shipped Revenue, Units Shipped, Demand Forecast, and Net Receipts for Vendor accounts.
-
Amazon Marketing Cloud (AMC): Used exclusively for Intentwise Explore and custom AMC queries. Enables analysis of audience paths, attribution, and media mix modeling. Associated with Instance ID.
-
Amazon DSP: Includes Amazon DSP campaign metrics like Impressions, CTR, Video Views, Conversions, and Attributed Sales. Associated with Advertiser ID.
-
Instacart: Surfaces Instacart advertising data including Impressions, Spend, ROAS, and Units Sold. Associated with Client ID.
-
Walmart: Includes Walmart Connect advertising data such as Clicks, Impressions, Spend, and Attributed Sales. Associated with Account ID.
-
Criteo: Provides Criteo ad campaign data including Spend, Conversions, and Revenue. Associated with Account ID.
-
Marketplace Intelligence: Adds data for Share of Voice and Content Analytics on Intentwise.
-
Intentwise Analytics Cloud (IAC): Centralized reporting destination that consolidates data from all supported platforms for advanced analytics and visualizations.
Filters:

You can search by Account Names, Connection Status, Subscription Type, Subscription ID, Account Types, Account ID, and Marketplace.
Manage your Accounts
-
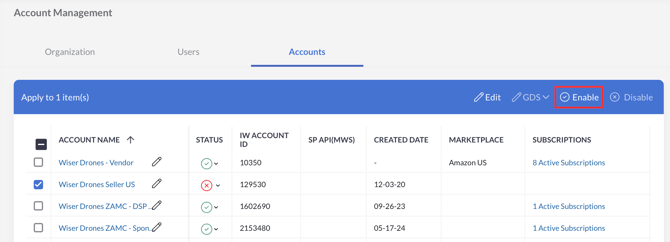
Enable Accounts: select the account and click on Enable to make it active on the platform. It will take around 24 hours for the account to activate. Once active, you'll be able to see the last 60 days of data for an Amazon advertising account.
-
Disable Accounts: select the account and click on Disable to deactivate the account from Intentwise.
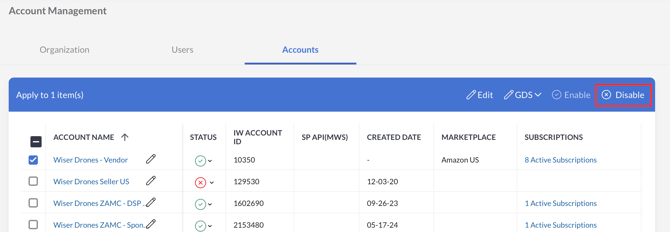
Note: The account can be disabled only and can't be permanently removed from the list.
-
Update Display Name:

Click on the edit icon to see the detailed information of the Account.
-
Update User Access:
You can search for the users and update the access to any particular account from Edit > Users. Alternatively, you can update any user access from the Accounts > Users tab as well.
-
Subscriptions:
Subscriptions will list all the active subscriptions for a particular account. The subscriptions on this screen are not editable.
-
Set Up Total ACOS (TACOS):
In this field, you can opt for either Shipped Revenue or Ordered Revenue to be factored into the Total ACOS calculations on the overview tab for a specific account.

Frequently Asked Questions (FAQs)
How can I check my Merchant ID/Entity ID on Amazon?
Merchant ID:
In Accounts, only seller accounts will have the Merchant ID. You can get the Merchant ID for Seller accounts from Amazon Seller Central > Settings > Account Info > Business Information > Your Merchant Token.

Entity ID:
In Accounts, only vendor accounts will have the Entity ID. You will find the Entity ID in the URL when you open the account on the advertising console.
![]()